WELCOME!

WELCOME!

Hello everyone! I am thrilled to have you visit with me and I hope you enjoy your stay. I absolutely love company, sharing, and making new friends so I hope you find something here that inspires, motivates, or just pleases you in some way.

Of course, I love to visit and be inspired also. So if I don't already drop in on you, please let me know where I can find you and I'll hop on over to see what you're doing or to just say "hi".

Before you go, I would love it if you'd please leave me a comment letting me know you dropped in! Actually, I'd just love to hear from you -- comments, opinions, or questions you'd like me to answer.

In the meantime, relax and make yourselves at home... you're family here!!!

I'll be seeing you!


Sunday, October 30, 2011

A CARD TO SHARE AND AN UPDATE (OF SORT)!!!

Happy Sunday, family!!!  I hope all's well and that everyone is enjoying themselves crafting and/or getting ready for Halloween festivities!!!  Buster and I are just about ready!!!

So as not to forget, if you haven't noticed it on the top of my sidebar, I'm participating in the blog hop/challenge to help celebrate Rhonda's and Amy's birthdays.  All the information will be available soon and I hope you'll all plan on joining us for all the fun -- I'm sure there'll be candy and there's a grand prize to be given to some lucky person!!!  And, oh, I have a "sweet" little project I think will surely please!

Right now, I have a card to share with you.  This card can be used as a sympathy, baptism, or christening card; maybe more but those are the only ones that come to mind... lol!!!  Anyway, I left it blank because -- obviously -- I don't know it's purpose and/or the occassion I'll use it for; therefore I'll add wording when a situation arises.  It's difficult to see but I added silver stickles to the cross chain on the praying hands to match the cross on the ribbon:


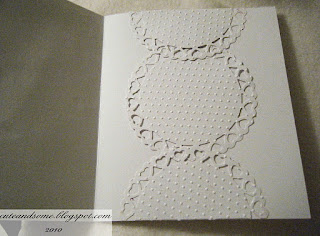
This is a picture of the card open:


The middle circle on this card can be removed to write a message on the back or, depending on the occassion, you can even slide a picture in between the top and bottom circles (for instance, an occassion such as a baptism):


Well, I hope you like it!!!

I'd like to thank each and every one of you who sent such kind and warm words regarding my fall.  I appreciate every word but I do believe there's nothing at all to worry about -- again, I have no pain and nothing hurts.  I know I have other family who do not live close who have expressed concern too, so just to show you that most of the swelling has gone down, I've taken a picture... lol!!!  Now be forewarned I'm not looking my best, okay?  The hubby took this picture just a bit ago and I'm at home, so I'm not primped up and I haven't curled my hair so I have a "flat" top... lol (hubby says I'm still beautiful -- isn't he a sweetie?)!!!    The only swelling is very slight; the tip of my nose, my upper lip, and my jaw is just still a wee bit swoll:


So now you see?  It's not so bad at all!  By the time I go back to the dentist for the x-rays, all the swelling should be down!  I hope this makes everyone feel a bit better! 

Well, I'm off again!  Still gots lots to do in a very short time, so...

Hugs, love you all, and I'll be seeing you!


Friday, October 28, 2011

A FRAME-EASEL NOTES GIFT BOX

Hello, everyone!!!  Hope all's well!!!  Welcome to a new follower, and thank you for joining me!!!

Sorry, I've been away the last several days, things have been pretty hectic.  I've had so much going on with things to do for my aunt, household things, and even having to sit in both an emergency room and my dentist's office because I had a really nasty fall.  After being checked out, I'm okay!!!  I still have to return to the dentist though because there was too much swelling in my face for them to get a full x-ray to make certain I don't have any fractures to the lower gums-- I fell on my face with my bottom jaw hitting the concrete first and taking the brunt of the fall.  I think it'll all be fine however, as after the initial shock of falling, I have no pain -- thank God!!!  Although I'm accident prone, this was not my fault.  There was a slight rise in the sidewalk where the 2 blocks of concrete met, which happened to be on a slope, so the tip of my foot hit the rise and away I went flying through the air without the greatest of ease...lol!  I'm laughing because I really do feel fine and it all seems kind of funny now.  I think once all the swelling goes down, they'll find my worse injury was that I bit through my lip.

Anyway, I've still got lots to finish up (and the never-ending errands to run for my aunt), including another blog hop and  DT project within the next week; therefore, I will be in and out of here until I get caught up.  I will, however, make time to drop in on you as I can, and even try to sneak in a small project I'm almost finished working on before then.

The project I'm sharing with you today is one similar to something I saw a while ago browsing the internet.  I feel in love with the original but I didn't know how the creator did hers, so I had to fashion my own.  Mine is a smaller and condensed version, and not as nice but overall I think I did okay.  I thought this little box would make a wonderful gift for a boss, co-worker, or even a teacher to place on their desk.  To describe it, it's a frame attached to an easel lidded box (just like on the easel cards)  that sits upright to display the insert in the frame while also allowing access to the note paper inside the box. I've inserted the words "Live, Laugh, Love" into the frame but it can also hold a small photo (great for a picture of the new grandchild, right?!!!).  Well..., see for yourselves!  Here is the box opened with the frame in an upright position on the easel so that the frame insert can be displayed while allowing access/exposing the note sheets inside the box:


Here is the box fully open to the note sheets inside:


This next photo shows the box completely closed (a top view):


And this final picture shows the box from the side (a view of the frame on the easel):


I will be doing a cut.file for this box but, right now, I really can't promise when.  Also, I haven't forgotten about doing a tutorial on the wedding box, so that too will be when I have more available time.  I will get to them both as soon as I can.

I'm sorry to have to be out of here again but I really do have a lot going on right now!  As I said I'll be in and out often enough that I won't miss you too much -- nor you me!  LOL!!!

In the meantime, I'm extending my love to you all!!!  Thank you for taking time to stop by and as always...

I'll be seeing you!

Tuesday, October 25, 2011

A CARD TO SHARE

Happy Tuesday, all!!!  I hope you're having a great day!

I'd like to say hello to several new followers too!  Welcome, and I'm so very glad to see you!
I've been running through the neighborhood visiting with some of you and, I have to tell you, it hasn't been easy!!!  What in the world is going on with Google Blogger?!!!  It's definitely been acting more weird than usual this afternoon, and early this morning!  Even last night I tried to visit and my Reading List was gone again -- I waited for a while and just decided to go to bed with the hope it'd be here today; thank God it was!!!  Hope you aren't going through these same annoyances!  I guess with improvements comes these little "quirks" which could drive you almost nuts!!!  LOL!

Anyway, I have a card to share right now.  This card was not only a delight to receive from my friends, the Cricut Couple, for my birthday but an inspiration.  So much of an inspiration, I wanted to make a pretty card with a cage too.  Of course, mine isn't nearly as beautiful as what they made me, but I love it just the same.  I haven't added any words or sentiments to this card because I just wanted to do it and didn't have a clue where it was going, or to whom:


Here a closer shot but you can always double-click on it too:


And here's the inside of the card:


Well, I'm almost done with another project -- one I think you'll all really like, so I'll be back!  I will get around to doing some more visiting too; however, between Blogger being slow and acting crazy, and some household necessities, it may take a while so please be patient with me.

Hope you like my card!!!  And if you haven't visited with the Cricut Couple before, their blog is a "must see".  Click on the link above and drop in; they're always prepared for company!!!

Love you all, hugs, and...

I'll be seeing you!

Monday, October 24, 2011

IT'S TIME!!! A BLOG CANDY WINNER!!!

Hello, everyone!!!  I hope everyone had a wonderful weekend!
I had a wonderful weekend!  The hubby and I spent all weekend together; we went to check out the Breast Cancer Awareness Marathon, admired our lakefront, and we even went to the JFA (Jewelry, Fashion and Accessories) Show!!!  The weather this weekend was fabulous, the temps were in the mid-to-upper 60's, and it was just too gorgeous outside to spend indoors; even Buster enjoyed the outings.  Besides these may be the last days of comfortable temperatures and we didn't want to waste them... lol! 

Okay, I know you probably thought I'd forgotten about announcing the winner of Halloween/Fall Blog Hop but not this time... lol!!  The winning number that Random.org selected is:

This means the 21st commentor, Sherri K, is the winner of my papercraft kit.  Congratulations, Sherri.  I hope you enjoy it!!!  Sherri, please email your mailing information to:  audreyfrel@sbcglobal.net.  You will have until Saturday, October 29, to claim your winning!!!

Well, that's about it for now.  I am currently working on several projects to share with you and I will be around to visit with you all as soon as I can.  With such a busy weekend, I'm back to where I always seem to be lately -- trying to catch up!!!  LOL!!!

Before I go, I want to say not to be disappointed if you didn't win -- there's always another chance right around the corner!!!  Okay?

Thanks for stopping by, and thanks so much for all your wonderful comments on my hop project.  It was wonderful having you all come over.   Hugs, and...

I'll be seeing you!!!

Saturday, October 22, 2011

A GIFT BOX FOR THE SEASON!

Photobucket

Welcome to the Bugbytes Halloween / Fall Challenge Hop hosted by Pam!!!  Pam and the Bugbytes Design Team are looking forward to your joining in the fun by linking a Halloween or Fall theme project, or a black and orange project, in the challenge -- as well as joining us in the Hop!!!  Of course, Pam has a  special challenge prize for the lucky winner of the challenge but, of course,  you'll have to head on over to Pam's for all the challenge information.  Just click here for a direct link to Pam's where you'll be able to get details on linking your challenge project. So, I hope you're ready for lots of fun; you won't want to miss it a minute!!!
We've prepared to greet you with some really great projects for your viewing pleasure along the Hop and some of us even have blog candy made especially for you.
Here is a list of the participants in the order they're ready to receive you:
Jen from http://3catsandabug.blogspot.com/
Lori from www.scrappinmystressaway.blogspot.com
Jeannie from http://nonnasscraps.blogspot.com/
Audrey from http://cuteandsome.blogspot.com/  THIS IS ME -- YOU'RE ALREADY HERE!
Kymberlee from http://www.thepapermidwife.com/
Allison from http://goodybagdiva.blogspot.com/
Kelly from http://www.kamscraftyplace.blogspot.com
Debbie from http://debseclecticthoughts.blogspot.com/
Carole from http://www.onmycraftroomwall.blogspot.com/
Kate from http://sassyandscrappykate.blogspot.com/
Amylynne from http://www.amysscrappyspace.blogspot.com
Mila - M&M from http://milamemories.blogspot.com/
Dayna Sabrina from http://sabrioletdesigns.blogspot.com/
Elizabeth from http://www.217creations.com/

The project I've prepared for you today is a box for the season.  I sooo wanted to do this box but I also wanted to capture the colors of fall to fit into the theme of the hop, so this box is a combined effort.  I'm calling it "A Gift Box For The Season":


This is a basic gable box, however, I altered the top of it by rounding off the handle instead of it having the typical square or half octogon shape.  My inspiration for the handle design came from a Lauren Meader box I saw some time ago.  I thought the top/handle was so different that I retained the idea of it to lift and use on one of my future boxes -- this was it!

I am providing a cut.file below (at the end of this post) for this box.  The cut.file uses the George cart and here's what the file looks like:


This is the template once the file is cut:


To constuct the box I bone-folded along the fold lines that I've indicated with shaded lines below:


Before adhering the box I covered the inside window frame with vellum; however, acetate or transparencywould have also been great choices:


Now I'm ready to glue the box together:  working with the back of the box facing me, I located the tab extending from the right-side middle panel of the box; I folded the tab up and added glue to the bottom of the tab (Note: the bottom of the tab is actually the front); next, I fold over the left panel and adhere the bottom of the panel to the bottom of the tab making certain the edges are evenly aligned.  The picture below shows where I placed the glue on the bottom side of the tab on the left side of the box:


Finally I fold up and glue the tabs in place on the bottom of the box.  Here's the assembled gable box with the altered handle:


Now the box is complete, and ready for me to decorate and embellish any way I'd like.  Here's the recipe I used on my box:


The 2 scrolls were cut from Anna Griffin's Adhesive Felt Borders Colllection, shown on the left; the 3 silk roses I cut from a stem of roses and wired them together; the autum leaves are by Prima; and I don't know the correct name for the stuff used as a filler for many flower bouquets but it was green with white so I spray- painted it with Walnut Ink.  I arranged it to my liking on the box, glued everything in place, and added accent ribbons.

You can fill this box with a nice Thanksgiving gift of a bottle of lotion or other toiletries, candy, cookies, etc.  It's a fairly good size box to have fun with for the fall season and Halloween holiday!!!

Now for my blog candy!!!  Everyone is eligible to win by just commenting.  However, please note, if the winner lives outside the U.S., he/she will be responsible for additional mailing cost.  The winner must contact me by the deadline date which will be provided once the winner is selected or the prize will be submitted for another drawing.  The drawing will be held on Monday, October 24, before the end of the day.  The winner will be chosen by Random.org.  Here's the candy:


I put this little kit together just for you and I think you'll like it!!!  Good luck!

Okay, if you haven't been there already, getting to Pam's is easy from here: click on the link in the first paragragh of this post, or you can click on the challenge logo/picture provided on my side bar on the right-hand side of this page at the top under the Halloween/Fall Challenge Hop announcement.  So come on over...  link your project(s) to enter the challenge -- and participate in a really fun hop!!!

Thanks so much for joining me, and now the others are anxiously awaiting your arrival!  We're really looking forward to seeing everyone and seeing your wonderful project entries in the challenge!!!

Hugs, and I'll be seeing you!

Available Cut.File (George Cartridge):

Friday, October 21, 2011

TOTE-IT!!! NOTE IT!!!

Hello, everyone! Again today I'm presenting another monthly DT project here and at Pam's. If you haven't joined me there, I hope you're joining me here!  If you'd like to also visit the Bugbytes Blog, just click on Pam's name -- it's a direct link!

Today, I'm sharing a little tote bag project.  This project was lifted from one I'd seen similar somewhere while cruising the internet some time ago.  Whoever created the original for this bag, I wish to let them know I think it's just the cutest!  Having found myself again at the last minute trying to figure out a DT project to do, I decided to finally give this one a go, and I hope you like it.  I'm calling this "Tote-It , Note It"; you'll see why at the end of the tutorial.  For now here's my project tote bag:

What I needed to make this tote:

2- 15" long strips of grosgraine ribbon (for the handles)
2- 4.25"x 5.50" cardstock (for tote front and back covers)
2- 4" x 1.50" cardstock (for botttom and inside bottom cover panels)
1- 2"x2.50" cardstock (for tote pocket)


Starting with one of the 4.25" x 5.50" cardstock sheets; with the 4.25" side across the top of the scoreboard, I scored down the length of the 5.50" side of cardstock at 1":


Turning cardstock so that the 5.50" side is across the top of the scoreboard, I scored down the 4.25" length of cardstock at 1/4"; the next scores are scored only to the 1" scoreline across the 5.50" length of cardstock --  I do not exceed scoring below the 1" scoreline -- , score at 1.25"and 4.50":


I've highlighted my scorelines with a marker so you can see what it looks like after scoring:


Next, as shown below, I cut out the small corner section connecting the 1/4" and 1" scorelines, and drew in and folded a diagonal fold on each 1" corner square:


I did the same exact scoring to the other 4.25" x 5.50" cardstock making certain to bone-fold all the scorelines to precisely so that the tote assembly would be easy when constructing the tote.
With the tote front and back pieces facing upward, I laid them out and added glue to the tabs only:


I turned over one of the panels so that I'd have the top front of the tote opposite the top back as shown below:

 I attached the front of the tote to the back by laying the two cardstocks one on top of the other and  gluing the edges without tabs to the glued tabs on each side -- making certain to keep the edges on each side perfectly aligned:


Once the glue dried, I gently squeezed the sides of the box to slightly open it, and then I folded in the triangular corners in place on all four (4) sides and glued them down -- this is tricky, if/when you do this take your time!!!  This is also where  precise bone-folding will pay off:


When all four (4) corners are glued in place the bottom looked like this:


Now I'll add the handles by gluing the ribbon ends about 1" from the edges of the box bottom on each opposite end.  I'll repeat this for the ribbon handle on the opposite side:


After the handles are attached, as show beow, take one of the 4" x 5.50" panels and glue to the bottom of the box to seal and close off the gap/opening and seam:


I used the other 4" x 5.50"  panel and glue to the inside bottom of the box.

Now I'm almost done!  I glued the 2" x 2.50" pocket piece of cardstock to the front of the tote, then glued the ribbon handles in place up the lenght of the tote (for interest I added the strip of paper you see around the top opening of the tote) :


The box is done!  To embellish and finish it offt off, I used a white Pearl Pen to add the pearls to the ribbon and the same pen to outline the top of the pocket and along the opening edge, and popped on some little ribbon bows.  I decided to stick a pencil in the pocket and a matching notepad in the tote, called it my "Tote-It!!!  Note It!!!", and here it is:


Isn't this tote cute?!!!  Now it's your turn to make one!  If you do, I hope you'll let me see it when it's done!!!

Thanks so much for stopping by, and I hope to see you all tomorrow at the Bugbytes Halloween/Fall Challenge Hop!!!

I'll be seeing you!!!


Wednesday, October 19, 2011

A PROJECT AND AN AWARD TO SHARE!

Hello, everyone!  Hope all's well!!!  And hello to several new followers too!  So glad you found your way home!!!  If I haven't already, and if I can find you, I'll be around to drop in on you too for a visit at your place soon.

Wow, it's been an interesting couple of days; I've been going full-force with no slowing down.  But I'm a lot like that little energizer bunny, I keep going and going and going....!!!  LOL!
I thought you'd all like to know how absolutely thrilled my friend and her hubby were with the money box!!!  Everyone at their celebration just "oohed and awed" over it!  It really was such a fun gift to give.  I've actually been asked for instructions and I'll try to put something together; however, this box came along as I was constructing it and I didn't note or tutorialize it.  I just completed it, took a picture and gave it to the happy couple.    But I know how to do this again and, like I said,  I'll put something together for you when I have more time.

Now regarding the project I'm sharing today and an award I received.  I'll save the best for last and begin with my project!  Hoping to get a headstart on Christmas presents this year, I was thinking on little Christmas presents I'd like to pass around and/or use as stocking stuffers and, well, while browsing in a Dollar Tree store I saw these little bibles.  Once I saw them, I knew just what I was going to do.  Now the first one is not decorated or embellished for Christmas because the hubby lost another close friend and because I'd come up with the idea, I thought it would also be a nice little gift for the deceased's family, so this one I made as a condolence gift. I plan on dressing the others up more appropriate for Christmas.  Anyway, you'll get the idea.  Here's my bible in a box gift idea:


This next picture is the side of the box:


This last picture shows the bible I purchased for $1 which the box houses.  You'll also notice the paper which was used on the side of the box also complements the inside bottom of the box:


Really I think this little gift can accommodate about almost any occassion depending on how you embellish it.  And it probably cost less than $2, considering the cost of the sheet of paper!  So, I hope you like it, and that it inspires a nice little gift giving project for you too!

Now I'd like to please take just another moment to share an award that I recieved from two wonderful family-friends: Eva and Jani. They both passed me the Versatile Blogger Award:


Thank you ladies so very much!!!  I appreciate each time I'm thought for something so special as these awards.  As I'm still considering who I'll be passing this award on to, I like to postpone doing that until I have more time to give it appropriate attention; therefore, I'll be back later to post who will be receiving it from me.  I hope you ladies don't mind!  In the meantime, I hope everyone visits my family-friends by clicking on their names (which are direct links to their blogs) and tour their wonderful blogs for fun and inspiration!

Well, that's it for now.  However, I do want to thank you for stopping by to spend this time with me.  Hugs to you all, and...

I'll be seeing you!

Sunday, October 16, 2011

A ONE-YEAR WEDDING ANNIVERSARY MONEY BOX

Happy weekend, everyone!!!  I've been enjoying getting around visiting and admiring all the wonderful projects you've been creating!!!   You are all so amazingly talented!!!  Anyone I missed, don't worry, I'm coming!!!

I've been so busy with numerous things, however, I have been working on several projects.  I had another check-in with my doctor and all's well.  Had a few errands to run for the aunt (yep, I'm back at it again...lol!), had to take "the" Buster for grooming -- blah, blah, blah;  but I finally finished one of the projects I've been working on.  Well,  I pretty much had to considering it'll be going with me and the hubby later today to an anniversary celebration.  A good friend of mine and her DH are having their 1-year wedding anniversary celebration.

The gift for this couple came as somewhat of a surprise to me.  Instead of a card, my creative juices started flowing to make a money box.  The idea to do this just popped into my head though because my intention actually WAS to make a card.  But..., I like this better!!!  And I don't think I could have planned this box any better -- wherever, in the far-far recesses of my mind, this idea came from;  if I did I'd definitely like to tap into it a lot more... lol!!!.  Here's the money box:


Okay, let me tell you -- this money box can fool you because the base is not the box!  It's the little round box on the top!  To talk about my box a little, the box is detachable -- it's held to the base by magnets so it can be removed to easily get in and out of the box:


There's a little standing tag on the back of the base reading it's from Leonard and me; and when you open the lid of the box... that's where the gift of money is tucked away!!!


I added a bit of everything I could find and get my hands on once the thought of it was coming together... lol!!!  I've added lace, satin ribbon, beads, rhinestones, flowers, and -- of course -- Stickles!!!  I embossed it and even personalized the top of the box for the happy couple with a bottletop cabachon!!!

Don't you think this is a more exciting gift to give than just a card?!!!  It's so different and I had so much fun doing this box.  I really hope they like it, and I hope you do too!!!

I hope the rest of your weekend is a happy and crafty one!!!  I'll be back with another fun project soon!!!  However, right now I'm going to get a few hours sleep before I have to get ready to take my gift to the anniversary celebration.

Thanks for taking time to stop by, I always love and appreciate your coming over!!!  Or, and you are at home when you're here I hope you know!  For now, hugs, and...

I'll be seeing you!

Friday, October 14, 2011

OMG! I FORGOT MY "400 FOLLOWERS" RAK ANNOUNCEMENT YESTERDAY!!!

Happy Friday, everyone!!!  I am soooo sorry, I forgot about announcing the RAK winner in honor of my 400 followers!  I've been trying to juggle several things and it totally slipped my mind!  I also thought yesterday was Wednesday -- where did this week go?!!!  Please forgive my keeping you waiting.

The number selected by Random.org is:


The winner is:  HAPPYSCRAPIN!!!

Happyscrapin, please contact me at audreyfrel@sbcglobal.net with mailing instructions for your Tim Holtz set.

Thank you all for following me, I love and appreciate every one of you.  With that being said, please look forward to the next RAK I'll have for you soon -- I want to try to make all of you happy with time with opportunities to show my appreciation!!!

In the meantime, I have been able to sneak in some visits and I'll get to more of you as I can (had a bit of a problem with Blogger which slowed me down a bit though).  I also have a couple of projects in the works that I think you'll enjoy!!!

That's it for now but I'll be back!  I'm hoping I get one of my projects completed today, so I may even see you later today!  Thanks for stopping by, and...

I'll be seeing you!

Wednesday, October 12, 2011

PEONY FLOWER CANDLE BASE TUTORIAL!!!

Hello, everyone!!!  I hope all's well and that you're all happy crafters!!!

You're all just sooooo amazing and I love you all for being yourselves, and  I'd like to thank you for being so wonderful and dropping by to visit (and follow) my new friend, Sheila's, new blog.  I hope you enjoyed your stay!!!  I believe Sheila will appreciate all the love!!!

I've gotten a couple of emails requesting a tutorial on the peony flower base candle holder I did for Brenda's birthday blog hop, so I put one together for you.  I think you'll be surprised at just how simple it is.  In case you don't remember it, it was this one:


To put this candle base together you need oven-bake or air dry clay (whichever you prefer) and Liquid Sculpey to use as an adhesive for the clay.

To begin, pinch off a piece of clay just large enough to close your fist around, and begin shaping it into a ball by rolling it between the palms of your hands:


Next begin flattening the clay out by pressing it between your fingers and turning it constantly as you go to start forming the base petal for the votive.  As you are turning, pressing, and forming the circular petal base try to get it as flat as possible while pressing it between your fingers; however, do not worry about it being irregular or having fingerprints, etc. -- we want this.  If it tears, just pinch the clay back together and continue on.  As an example, here I am pressing, turning, and shaping the clay:


Continue working the clay until you have a circle large enough to fold up and cover the sides of a votive candle:


Leave the voltive with the clay wrapped up the sides and form 4 to 5 more of these petals (depending on the fullness you want).  Now, taking a second petal, add a dab of Liquid Sculpey to the center:


Adhere by pressing the center of the second petal firmly to the bottom center of the first petal attached to the votive.  Using your fingers begin shaping the petals to look like a peony flower:


Add the remaining petals by gluing them on with the Liquid Sculpey and form/shape the petals with your fingers as you did with the first petals; lastly, remove the votive and you should have a base that looks similar to this:


Now how easy is this?!!!  All that's left to do is for you to decorate it.  You can spray it, paint it, use rub-ons -- it's all up to you!!!  For the sparkle on mine base, after I blended together several color glazes to apply on it, I sprayed it adhesive and sprinkled Diamond Dust over it. 
Okay, don't forget to leave your wonderful comments for my blog candy by going to the top of my side-bar on the righ side of this page and clicking on the link to that post.

Well, that's it for right now but I'll be back later to visit with you and admire more of the awesome projects you do!!!

Thanks for stopping by, and...

I'll be seeing you!