WELCOME!

WELCOME!

Hello everyone! I am thrilled to have you visit with me and I hope you enjoy your stay. I absolutely love company, sharing, and making new friends so I hope you find something here that inspires, motivates, or just pleases you in some way.

Of course, I love to visit and be inspired also. So if I don't already drop in on you, please let me know where I can find you and I'll hop on over to see what you're doing or to just say "hi".

Before you go, I would love it if you'd please leave me a comment letting me know you dropped in! Actually, I'd just love to hear from you -- comments, opinions, or questions you'd like me to answer.

In the meantime, relax and make yourselves at home... you're family here!!!

I'll be seeing you!


Saturday, December 31, 2011

WISHING YOU ALL A VERY SPECIAL AND HAPPY NEW YEAR!!!

HAPPY NEW YEAR!!!
From the Frelix family to you and yours, have a very happy and safe New Year celebration!!!


I'm off to spend time with our families but wanted you to know you'll be included in my "thank you's", hopes, and prayers when I'm celebrating bringing in another wonderful year!  I really do look forward to new adventures, new blogging family friendships, and the continued sharing of inspirations!!!

I truly love you all!!! 

I'll be seeing you!!!

Thursday, December 29, 2011

ANOTHER BELATED CHRISTMAS PRESENT DONE!!!

Hello, all!!!  What a beautiful day God has made!!!  I can't believe the weather here!  Although scary, it's almost 50 degrees, sunny and brightm and we haven't had any accumulated snow here in Chicago; first Christmas season I can remember that wasn't white!!!  LOL!!!

I have another little belated Christmas present ready to give at our family New Year's celebration.  This one is also for a neice but one a bit older who just LOVES glitz and flash.  It's a jewelry set I made of a bracelet with a pair of earrings:


I used that mesh stuff again and I think I'm really getting hooked on it; I've thought of so many uses for it already!!!  Of course I've been asked where I found it, and I got it at a local fabric store in my neighborhood.   It must commonly be used for weddings because that's the section I found it in.  They had swatches of assorted colors but the only ones they had available were silver and gold -- the store clerk did say they were expecting more but didn't know when it'd be in.  Well, I saw the swatch for purple and it was gorgeous -- knew I had to have that color, so I sent searching the internet.  Well I found quite a bit of this mesh but much more expensive -- some was even as high as $25 a yard!  I got it at the fabric store with 5 yards to a spool at $6.99; on the internet you'd be ordering it at the lowest for about $5 for only 1 yard -- so check out the wedding/bridal sections in your fabric stores -- much better deal!!!  Sadly, I'll just be waiting to get that purple... lol!!!

Well, I hope everyone's great and having a wonderful time.  It's been so great being able to visit with you and, of course, I'll be back!  If I haven't gotten to anyone yet, I'm still working at it!!!

Still have several more gifts to make so I'm off, but...

Hugs, and I'll be seeing you in a bit!

Tuesday, December 27, 2011

I'VE A NEW RAK WINNER, AND A PROJECT TO SHARE!!!

Hello, everyone!!!  Well, I'm back to announce another winner and I also have a little belated Christmas present project to share.

The number Random.org selected for the vellum/paper set was #8:


Congratulations to "Love My Paper"!!!  You are the winner of the blog rak.  You will have until the end of the day Friday to contact me with your mailing information to audreyfrel@sbcglobal.net.  Thank you all for your wonderful comments!!!  And keep checking because I have another small rak coming up very soon now again!!!

Now for my project.  As I mentioned I wasn't afforded the time this year to get any shopping done in time for Christmas and I promised my family I'd have presents for them before our  New Year's Eve celebration.  I have managed a few purchases but I've also enjoyed making a few presents also.  I'd like to share with you a quick and easy charm bracelet I just finished for my little neice:


She's 13 years old and that's such a difficult age to make a handmade gift decision for, but I'm hoping she'll like this!

Congrats again to my winner!

I'm off to play now, so I love you all, hugs...

I'll be seeing you!


Monday, December 26, 2011

A PLAIN BIC PEN TO AN ALTERED BLING PEN!!! AND A GIVEAWAY!

Hello, everyone!!!  I hope you are all having a wonderful holiday!!!  I had such a wonderful day yesterday; great fun, great food, and great company!!!  After my late start holiday hustle-bustle, I actually have spent today relaxing and playing a little bit -- and wow did my body need this day!!!  LOL!!!  It's been a while since I've been really comfortable;  I feel terrific!!!

I have a very quick project to share with you today, and I also have an up-for-grab rak which went unclaimed previously.  First I'll begin with my project.  This was a plain Bic pen which took me less than 10 minutes to recylce:


And here's what it looked like when I finished:


Here's a view of the top of the pen:


The pen is actually silver in color.  I painted the entire pen with Adirondack silver mixative,glued on and covered it with a diamond-looking mesh, and popped a rhinestone the top.  I apologize for the glare; I couldn't get a better shot because it really does have loads of bling which made it difficult to snap a more decent shot.  However, it really looks great in person!!! 

I wish I'd had time to do these for Christmas presents!  LOL!  No matter, there're still many other occassions coming up for me to not miss an opportunity to pass these cuties out -- and they really are soooo easy!!!  Next time I think I'll really embellish and bling them up!!!  LOL!  And how about my doing a matching book and box to put them in?!!!  Don't you think that would be a great gift idea?!!!

Moving on now to the giveaway.  Several weeks ago, I participated in a "Holiday Blog Hop" and offered a vellum and matching paper set which, unfortunately, has went unclaimed by the winner -- sorry:


I am now re- offering this paper set to some lucky winner and, again, you'll be selected by Random.org.  You do not need to be a follower, you only need to leave me one of your wonderful comments to be eligible.  The winner will be announced tomorrow before 5 p.m. central time and will have until the end of the day on Friday, December 30, to claim this set.  Good luck!!!  Oh, and did I forget to mention there's also a little secret gift that's be included?!!!

Well, I still haven't made it around to visiting everyone but I haven't forgotten you by any means!  A little later, after I get the hubby fed and quiet, I'll be making more rounds.

That's it for now...

Love you, and I'll be seeing you!!!


Saturday, December 24, 2011

SOME CARD SHARING AND A HOLIDAY WISH!

Wishing You All A Very Merry And Blessed Christmas Holiday, Hanukah, Etc.!

Hello, everyone!  I hope all's well!  It's been such a pleasure visiting with those of you I've gotten to so far and although I still have more of you to get to, I did want to make certain I covered those that I am unable to reach by leaving a comment here.  I have so very much enjoyed spending this year with you, and very much look forward to all we share in 2012!!!

Although I haven't been around lately as much as I would have liked, I have no complaints!  Despite any/everything, God has been good to me and I have still been so blessed!  My blessings include having you as the dearest circle of family-friends that anyone could ask and/or hope for.  I do hope you holiday season will be as fulfilling and loving as mine has been.

Before I leave to enjoy my family, I thought I'd like to share with you a few cards I had the opportunity to get done this week.  The first three (3) cards have images I used from the Santa's Village cart:


And here are a few more:


Being I was so late in getting a start of making my cards this year, now I can only hope they reach their destinations before the new year!

I hope you like my cards, and I'll be back on Monday with a giveaway -- hope you join me!!!

Again, have a very wonderful holiday...

Love you all, hugs, and I'll be seeing you!


Friday, December 23, 2011

PROJECT/TUTORIAL I DID FOR LESSOLOGY

Hello, everyone!  I hope all's well!  It's a slow go but I'm finally working at getting around to visiting with you and seeing all your wonderful creativity that I've missed!

As I said yesterday, I was honored to be a guest designer for Lessology and did project of an altered frame.  Unfortunately, as I've MIA for quite some time I missed getting the opportunity to post it on Monday when it was presented so I'd like to share it with you now:


This was such a fun, quick, and inexpensive project to put together!  In gathering my materials I found an old 5"x 7" pressboard frame around the house and along with the following scraps I began preparing my altered frame:

5" x 7" sheet of foam board (cut to size for the frame back)
1.50" x 4" piece of foam board (cut for the frame stand)
4" strip ribbon (frame stand hinge)
4.50" x 6" sheet of transparency (for the frame window)
Tulip Permanent Puffy Paint
Gesso

For the frame corners, I cut a strip of 1/2"x4" ArtEmboss Brass Metal (light weight) which I ran through a Cuttlebug embossing folder; then cut the metal lenthwise in half and evenly into fourths across the width:

Next I formed my clay flowers as outlined on the pictures below and baked according to the manufacturers instructions:


With everything assembled I was ready to start!  To give the frame some dimension, using the Tulip Puffy Paint to paint them on,  I miminicked branches and leaves onto the pressboard frame and then allowed it to dry.  Once the paint was dry, I arranged and glued on my flowers to my liking, and painted the entire frame twice with Gesso (letting each coat dry in between):


When the last coat of Gesso was dry, I created the brass corners by folding the metal strips around the corner edges on the front of the frame to the back; next I glued the transparency on the back to cover the window opening, and then glued on the frame back.  For the stand, I folded the strip of ribbon in half lengthwise and glued only one-half of the ribbon to the frame back aligning the bottom of the ribbon to the bottom of the frame.  The remaining half of the ribbon that was not glued down to the frame back is where the stand was glued by laying and gluing an edge (lengthwise)  along the top-side edge of the ribbon (being very careful not to glue down the ribbon to the frame on the side where the stand is attached); this allows the stand to lay flat when not in a standing position.  To finish the back of the frame, I covered it with kraft paper to hide any flaws and painted all the edges.  The pictures below illustrate these steps:


To complete the frame, I painted the flowers using Viva Inka-Gold colors; next,  to age and color the brass corners I used Cranberry color Tim Holtz Alcohol Ink, and finished with Crystal color Stickles to highlight the frame:


All that was left was to pop in the picture!!!  I hope you enjoyed my altered frame, I most certainly enjoyed doing it for you!

Again, many thanks to Lessology for having me as a guest designer on their wonderful blog (love you guys!) and I hope I'll be invited to come back again.
Well, I'll be off to do more visiting -- can't wait to see more of what you've all been up to!
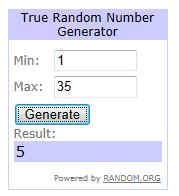
In the meantime, the winner of the last blog hop, "Kards by Karla", did not acknowledge her winning prize and so I'll be putting it back up for grabs within the next couple of days, so be on the watch for it -- it could end up being yours!!!

Thanks too to all of  you for taking the time to stop by!!!  Hugs, and...

I'll be seeing you!


HELLO!!! I'VE MISSED YOU!


Hello, everyone!  I'm okay!  I won't bore you with the hectic and frantic weeks I've been MIA, however, know that I have missed you so very much and have thought of you daily.  I do hope you're all doing well and having a creative, and great time, with your holiday preparations!!!

In my absence, a project I did for the Lessology Blog as a guest designer was presented this week on Monday and Tuesday.  I apologize for not being able to get here to let you know about it, I didn't realize it had posted until after it did myself, but  I will post the project in it's entirety tomorrow.  If you'd like to check it out before, you can find it here: 

I'd like to say thank you to all of you who have expressed concern as to my "whereabouts", I appreciate your thinking of me.  I'd also like to acknowledge a couple of new followers:  thank you for dropping by and welcome home!

There's just so much I need to catch up on and right now I'm busy pushing the clock trying to complete my cards to get in the mail so they'll arrive to their destinations at least before the end of the year -- hopefully.  Unfortunately, I haven't even gotten to  any holiday shopping, so that'll just have to wait as well -- everyone understands which is such a relief to me.  Right now I'm just thankful to be able to take a few minutes to chit-chat with you.  After writing this post I'll even be around to drop by on you.

I've been snapping pics of my cards this week as I've completed them to go into the mail and I'd really like to share them with you, so I'll have those to post soon for you also -- can't wait to see what you've been up too!!!

Anyway, just wanted to drop by and check in, let you know I haven't forsaken you -- now I'm off to visit with as many of you as I can before I have to get back to more card making, I've only about 7 or 8 more to go but I'm such a sloooowwww cardmaker!

Love you all, and...

I'll be seeing you!


Monday, December 12, 2011

HOLIDAY BLOG HOP RAK WINNER!

Hello, everyone!  I do hope you're all well!

Before I announce the winner of the Holiday Blog Hop, I'd like to say thank you so very much for coming out supporting the hop and for supporting me.  I know I've been MIA for a bit and I hate that, however, I'm not being neglectful -- I really do have a heck of a lot going on -- but I am doing well.  It is such a great feeling to know my friends are here, and I'm praying to get back to you as soon as I can.  Things are winding done and I sincerely hope I can get back to "life" within the next few days... lol!

I have tried to "peep" in on some of you but due to timing I was did not post any comments; I was just checking on you so-to-speak.

The winner of the blog hop of  December 9 for the matching vellums and papers, and the surprise grab bag was selected by Random.Org. and the number chosen was:


The comment corresponding to the number 5 is Kards By Kandi!!!  Congratulations!!!  You will have one week to contact me with your mailing information to audreyfrel@sbcglobal.net.  If I have not heard from you by 5 p.m. CT on  Monday, December 19, your RAK will be forfeited and another winner selected.

Well, I wish I could hang around a bit longer but, unfortunately, I'm pressed for time.  Hopefully, I'll get time to visit with you within the next day or so -- I really do miss you all!  And, again, thank you so much for being here for me, and for taking the time to stop by.

Hugs, love you all... and,

I'll be seeing you!

Saturday, December 10, 2011

TIME FOR THE HOLIDAY BLOG HOP!!!


Hello, everyone and welcome to the Holiday Blog Hop!!!  Thanks so much for joining us today, and we hope you enjoy yourselves and the projects we've prepared for you!!!  Of course, there'll be more fun and prizes along the way, but you'll have to visit each blog to see what they're prizes and rules are to be eligible.

Pam of  The Bugbytes is our hostess for this hop and I'm delighted to be a part of it.  Pam also has a wonderful hostess prize for some lucky winner too!!!  You'll want to check her blog out for sure for any additional blog hop activities -- like the blog hop challenge !!!  So head on over to her site, enter your project, and be eligible for another great prize!!! You can easily be directed to her blog by clicking on her blog name at the beginning of this paragragh or from the list below.  If you've just started this hop with me and would like to hop along with us from the beginning, I've provided a list of all the participants below in the order of the hop -- just click on their names in the order they're shown to be directed directly to their blogs:
  1. Pam - http://www.thebugbytes.com/
  2. Jeannie -  http://nonnasscraps.blogspot.com/
  3. Jen - http://3catsandabug.blogspot.com/
  4. Carole - http://www.onmycraftroomwall.blogspot.com/
  5. Lisa Brooks - http://thejourneyoflisaslife.blogspot.com
  6. Audrey - http://cuteandsome.blogspot.com/   YOU ARE HERE!
  7.  Mila - http://milamemories.blogspot.com/
  8. Sheila aka sassylady - http://shesasassylady.blogspot.com/
  9. Elizabeth - http://217creations.blogspot.com/
  10. Kelly Millet - http://www.kamscraftyplace.blogspot.com
  11. Dayna Sabrina - http://www.sabrioletdesigns.blogspot.com/
  12. Lori - http://www.scrappinmystressaway.blogspot.com
  13. Denine Vajja - http://pumpkinspiceblog.blogspot.com/
  14. Melissa - www.melissamade2.blogspot.com
  15. Allison -  http://goodybagdiva.blogspot.com/
A while ago for a blog hop I gave a recipe for a homemade liquid soap.  Since then I was recently asked about a lotion recipe from one of my followers and thought what a wonderful idea for this hop with Christmas so close upon us.  So, my project today is a quick and simple lotion recipe I found which can be designed for both men as well as women by simply changing the fragrance you use to scent it.  And, the best of all is you only need three (3) easy to get items to make it.  First let me show you a picture of the bottle of handmade lotion I've prepared and personalized to give to my cousin for Christmas:


Now I'm going to give you the recipe and tell you how to make it.  Here's what you'll need:
  • 1/2 cup of olive oil (any kind will do including a Dollar Store brand)
  • 1/2 cup of emulsifying wax (can be found at most craft stores, online, Amazon, EBay, Overstock, and Etsy) -- DO NOT USE BEESWAX OR PARAFIN WAX AS A SUBSTITUTE!!!
  • 1-1/2 cup distilled water
Put water in a clean/sterilized pan or pot and bring to a rapid boil.  While water is boiling combine olive oil and wax in a clean glass bowl/container and place container into a water bath (a pan or pot filled with enough water to cover at least 1/4 way up the bowl) and place on the stove; on a medium-low heat allow to heat until all the wax crystals have melted into the olive oil.  Once the mixture is thoroughly melted remove from stove and slowly pour the boiling water into the mixture beating the ingredients vigorously with a wooden spoon.  You'll immediately see the mixture turn a milky/creamy color, and the emulsifying wax acts as a binder allowing the oil and water to mix.  Beat every 15 - 20 minutes until mixture begins to cool and allow to rest, uncovered, for 24 hours.  That's it!!!  This recipe will fill a 12 fluid oz. bottle.

(As a note:  I also tried melting the wax/oil combo in the microwave and it worked just as well as the hot water bath.)

Now it's ready for you to mix in your favorite fragrance or essential oil, or your favorite perfume or cologne to taste.  Again, suit the scent for men or women with the selection of fragrance you use!!!  Since I made mine as a Christmas present, the scent is Holly Berry and this fragrance oil can be ordered from http://www.Naturesgardencandles.com.  Last,  just embellish a pretty lotion bottle, pour in the lotion, and it's all set to go!!!  And, how about combining it with a matching scented liquid soap as a set -- you can find my easy recipe by clicking  the following link to be directly linked to that post:  http://cuteandsome.blogspot.com/2011/04/its-earth-day-gabys-happy-birthday-blog.html.

Okay,my blog candy for you before you leave is a set of 6 matching vellum and cardstock sheets, and a "SURPRISE" package you'll receive with it:


All are welcome to leave me a wonderful comment and a winner will be selected by Random.org and announced on Monday, December 12, before 5 p.m. central time.  Good luck!!!

The next stop on the hop is Mila.  Click on her name to be directed to her blog, she's waiting with another great project for your enjoyment!

Thanks so much for stopping by, hope you had a bit of fun here!!!  And, as always...

I'll be seeing you!

Thursday, December 8, 2011

DON'T JUST GIVE THE COOKIES...

Hello, everyone!!!  I'm back with another DTproject I'm sharing over at Sheila's today, and I hope you enjoy it!  You can visit Sheila's place by clicking on her name to be directly linked to her wonderful blog.  As always, thanks to Sheila for having me and letting me be part of her wonderful team!!!  I look forward to all that's ahead in 2012!!!

One favorite Christmas/holiday pastime for so many has always been baking and giving cookies as a gift,  and how much fun we can have embellishing the packaging!!!  For my project today, I have a simple adornment/ornament for a cookie box or bag but which can also dress up a gift package bow as a tag and writing a message on the back; and/or can be saved to use as a tree ornament the following year after the cookies are gone -- it's an angel frame adornment/ornament.   This came to mind because my aunt loves cookies and she loves angels, so I'm going to combine her love for both in a simple gift this year.  When I purchased the  angel cookie cutter, I purchased 2; one for cookies and the other for the adornment.  Here's a picture of my idea for her cookie gift packaging:


This project is made with oven bake polymer clay, and you'll need a separate cookie cutter for the clay, a small cutter or object which can cut a frame into your clay, a picture of your choice to pop behind the frame, some paint, glitter, or whatever else desired to embellish the adornment.  Let me show you how I made mine.  I began by cutting out one clay angel to use as the backing of my adornment/ornament:


For the top layer (the frame), prior to cutting it out I first pressed a large stamp into the clay to give it some definition and character, then used a smaller cutter to cut out a frame (save the clay cut out from the frame and all the clay scraps for another project) :


After baking the two (2) angel cuts according to the manufacturer's directions and once cool, I placed my picture behind the frame of the top angel and glued the top angel to the back one.  Now it was time for me to dress it up!  Using Luster Rub-Ons in the russet color, with my finger I litely applied it to the top angel to highlight the raised stamp areas.  Next, again using my finger, I rubbed and entirely covered the piece with Crystal Ice color Stickles to mimic a sugar glaze:


Lastly I added a bow to the angel to match the cookie gift package!!!  Easy-peezy and all done!  And so many other possibilities; for example, add a stand to the back and replace the picture with names to use as table place markers, use as a card or scrapbook embellishment, etc.

Again, I'm sure you can use your imaginations and come up with all sorts of ideas -- give it a try but don''t forget to let me see!!!  LOL!!! 

Thanks so much for stopping by and joining me today!!!

I'll be seeing you!

Monday, November 28, 2011

MINI COOKBOOK WINNER!!!

Hello, family-friends!!!  I hope you all had a wonderful holiday weekend!!!  I thought of you over the last several days and included you all in my "things I'm thankful for" holiday prayers because you've all been a blessing to me -- more than I can tell you.  I look forward to our next years together!

I had a wonderful time with our families and got to meet a few new ones!!!  Being I was actually not at home, I do hope you've already forgiven me for not being here Saturday to announce the mini cookbook winner as I initially thought I would have had the time to sneak back here for a brief visit to do; unfortunately, the time got lost and I thank you for waiting.

Now to get that out of way...  the winning number selected by Random.org for the mini cookbook is:

The 18th commentor for the post is NICOLE!!!  Congratulations, Nicole!!!  You own the mini cookbook.  Please email me at audreyfrel@sbcglobal.net your mailing address!!!  I hope you enjoy your book!!!

I wish I had a project to share with you today, unfortunately, I haven't done any crafting since our holiday celebration began.  As everything is only now beginning to wind down, it may be another day or so before I can get started, but I'll be running in and out to see what you've been up to -- I can't wait to see all your wonderful projects I've missed!!

Hugs, love you all...

I'll be seeing you!!!

Wednesday, November 23, 2011

A CELEBRATION HAS BEGAN!!!


Our families celebrating has began!!!  We are visiting, rejoicing, and being thankful for so many wonderful blessings!!!

We all wish you a very special safe, warm, happ+,y and Thanksgiving holiday filled with love and blessings!!!

I'll be seeing you when this festive occasion is over...

Love and hugs!

Monday, November 21, 2011

KITCHEN DRAWER MINI COOKBOOK PROJECT AND A BLOG HOP WINNER!!!

Happy Monday, everyone!!!  I sincerely hope you all had a wonderful and creative weekend!  I finally finished cutting all those little Mickey Mouse treat boxes for my niece, and I even cut out an addition 11 of the turkey treat boxes.  I have to admit though that as much fun as they were to put together, I don't care if I ever cut another pattern/template again for a very, very long time!!!  LOL!!!  I don't even want to look at a pair of scissors right now!  HA!

To my new followers, thank you so much for deciding to join my family and I look forward to our visits together!  I'll be around to see you soon!

Before I announce the winner of the "Gobble Til You Wobble" blog hop prize,  a wonderful friend sent me the most adorable little silverware set stamp that I wanted.  I know this cute stamp will get a lot of use, and the first project I've used it for is this little mini cookbook which you can keep in a kitchen drawer:


When you unfold the top cover, it looks like this:


When you unfold the bottom cover it lays flat so this is what you'll have:


Or, if you fold back the top cover, the book will stand alone on a table or counter top like this:


Either laying flat or in it's standing position you can flip thru the recipe cards like this:


I'd like to say thanks again to my friend for this wonderful little stamp!!!  And..., SURPRISE!!!  If you like this little mini cookbook, it's a giveaway!!!  To be eligible for it, just leave me one of your wonderful comments on this post letting me know you'd like to have it!  No, you do not need to be a follower to win!  I will announce the winner on Saturday, November 26.  The winner will be selected by Random.org. and you will have 3 days to claim it.  (Sorry, will only mail within U.S.)

Now for the blog winner!!!  Random.org. selected number "19":


LISA808, you are the WINNER of the matching vellum and paper set!!!  Please email your mailing address to me at audreyfrel@sbcglobal.net

Well, I'm off to play!!!  Thank you all for taking time from your creating crafting to stop by!

Hugs, and I'll be seeing you!!!